
Arduino Uno: A Detailed Guide for Beginners and Makers
The Arduino Uno is the cornerstone of the Arduino ecosystem, widely regarded as the go-to microcontroller board for beginners, educators, and hobbyists. Its simplicity, versatility, and affordability have made it a staple in electronics projects worldwide, from blinking LEDs to powering robotics. In this detailed guide, we’ll explore what the Arduino Uno is, its specifications, features, applications, and why it’s the perfect starting point for anyone diving into the world of microcontrollers and prototyping.
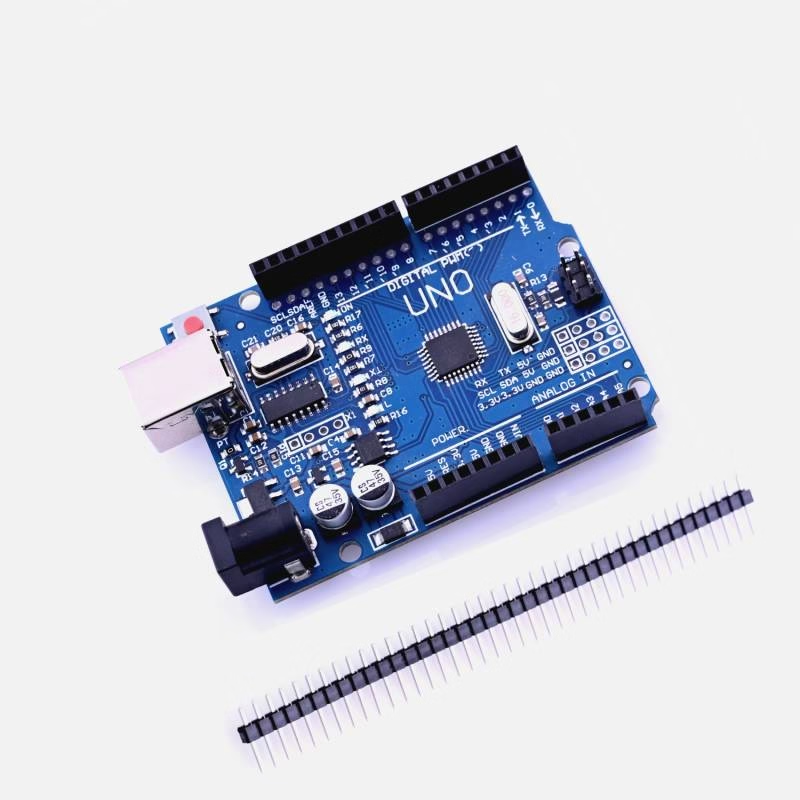
What is the Arduino Uno?
The Arduino Uno is an open-source microcontroller board developed by Arduino, designed to make electronics accessible to everyone. Built around the ATmega328P microcontroller, the Uno serves as the “brain” of your project, capable of reading inputs from sensors (e.g., temperature, light, or buttons) and controlling outputs like LEDs, motors, or displays. As part of Arduino’s open-source platform, the Uno is programmed using the Arduino Integrated Development Environment (IDE), a user-friendly software where you write C/C++ code (called “sketches”) to define the board’s behavior.
The Uno’s popularity stems from its balance of functionality and ease of use. It’s robust enough for complex projects yet simple enough for beginners, making it a favorite in classrooms, maker spaces, and DIY communities. Whether you’re learning the basics of programming or building a smart home device, the Arduino Uno is a reliable and versatile choice.
Specifications of the Arduino Uno
To understand the Uno’s capabilities, let’s break down its technical specifications:
- Microcontroller: ATmega328P (8-bit AVR RISC-based)
- Operating Voltage: 5V
- Input Voltage (Recommended): 7–12V
- Input Voltage (Limits): 6–20V
- Digital I/O Pins: 14 (6 provide PWM output)
- Analog Input Pins: 6
- DC Current per I/O Pin: 20 mA
- DC Current for 3.3V Pin: 50 mA
- Flash Memory: 32 KB (0.5 KB used by bootloader)
- SRAM: 2 KB
- EEPROM: 1 KB
- Clock Speed: 16 MHz
- USB Connector: Type-B
- Power Options: USB or external power (barrel jack, 2.1 mm)
- Dimensions: 68.6 x 53.4 mm
- Weight: 25 g
These specs highlight the Uno’s ability to handle a wide range of tasks while remaining compact and affordable.
Key Features of the Arduino Uno
The Arduino Uno is packed with features that make it a standout choice for electronics projects:
- ATmega328P Microcontroller: The 8-bit AVR microcontroller provides 32 KB of flash memory for storing your sketches, with 2 KB SRAM for runtime data and 1 KB EEPROM for persistent storage. Its 16 MHz clock speed ensures reliable performance for most applications.
- Versatile I/O Pins:
- 14 Digital Pins: Used for binary inputs/outputs (e.g., buttons, LEDs). Six pins (3, 5, 6, 9, 10, 11) support PWM for analog-like outputs (e.g., motor speed control, LED dimming).
- 6 Analog Input Pins: Read variable signals from sensors (e.g., potentiometers, temperature sensors) with 10-bit resolution (0–1023).
- Power Flexibility: The Uno can be powered via USB (5V from a computer) or an external 7–12V source (e.g., battery or AC adapter) through the barrel jack. It also provides 5V and 3.3V outputs to power external components.
- Standard Pin Layout: The Uno’s pin headers are compatible with most Arduino shields (add-on boards), such as motor drivers, Ethernet, or Wi-Fi modules, expanding its functionality.
- USB Connectivity: The Type-B USB port connects to a computer for programming and serial communication, making it easy to upload sketches and debug via the Serial Monitor in the Arduino IDE.
- Onboard LED: Pin 13 has a built-in LED, perfect for testing sketches without external components.
- Reset Button: Allows quick restarting of the board without unplugging power.
- Open-Source Design: The Uno’s schematics and firmware are freely available, enabling customization and community-driven improvements.
How the Arduino Uno Works
The Arduino Uno operates as a programmable microcontroller board. Here’s a step-by-step overview of its workflow:
- Power Up: Connect the Uno to a computer via USB or an external power source. The onboard voltage regulator ensures a stable 5V supply for the microcontroller and components.
- Write Code: In the Arduino IDE, write a sketch to define the board’s behavior (e.g., blink the onboard LED or read a sensor). The IDE supports C/C++ with simplified libraries for tasks like sensor reading or motor control.
- Upload Code: Compile and upload the sketch to the Uno’s ATmega328P via USB. The bootloader (a small program in memory) facilitates this process, allowing the microcontroller to store and execute the code.
- Run the Program: The microcontroller runs the sketch in a continuous loop, processing inputs (e.g., a button press) and controlling outputs (e.g., lighting an LED) based on your code.
Pin Functions
- Digital Pins (0–13): Handle binary signals (HIGH = 5V, LOW = 0V). Used for components like switches, LEDs, or relays. PWM pins simulate analog output for tasks like dimming.
- Analog Pins (A0–A5): Read analog signals (0–5V) from sensors, converting them to a 0–1023 range.
- Power Pins: Provide 5V, 3.3V, GND, and VIN (input voltage) for external components.
- Communication Pins:
- Serial (Pins 0, 1): For UART communication with devices or the Serial Monitor.
- I2C (A4, A5): For connecting to I2C devices like OLED displays.
- SPI (Pins 10–13): For high-speed communication with SPI modules.
- Special Pins: Pin 13’s built-in LED, AREF for custom analog reference voltage, and reset pin.
Applications of the Arduino Uno
The Arduino Uno’s versatility makes it suitable for a wide range of projects, including:
- Educational Projects:
- Learn programming and electronics by building circuits like LED blinker, traffic light simulator, or temperature monitor.
- Used in classrooms and workshops for hands-on STEM education.
- Sensor-Based Projects:
- Interface with sensors like HC-SR04 ultrasonic (distance), DHT11 (temperature/humidity), or LDR (light) to create weather stations or obstacle detectors.
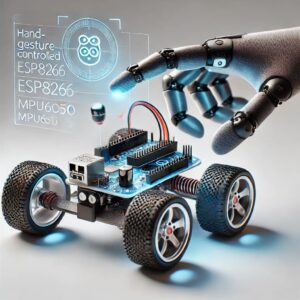
- Robotics:
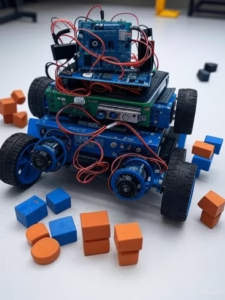
- Control DC motors, servos, or stepper motors using a motor shield to build robots or automated vehicles.
- Example: An obstacle-avoiding robot with ultrasonic sensors.
- Home Automation:
- Control lights, fans, or appliances via relays or smart modules.
- Example: A smart light system triggered by a motion sensor.
- Prototyping:
- Develop prototypes for IoT devices, wearable tech, or art installations.
- Example: A data logger for environmental monitoring.
- Interactive Installations:
- Create interactive displays or sound systems using buttons, sensors, and LEDs.
- Example: A MIDI controller for music production.
Getting Started with the Arduino Uno
To start using the Arduino Uno, follow these steps:
- Set Up Hardware:
- Purchase an Arduino Uno (official or compatible clone).
- Gather components like a USB Type-B cable, breadboard, jumper wires, LEDs, resistors, and sensors.
- Install the Arduino IDE:
- Download the free Arduino IDE from arduino.cc (available for Windows, macOS, Linux).
- Install drivers if needed (included with the IDE for Uno).
- Write Your First Sketch:
- Open the IDE, go to File > Examples > 01.Basics > Blink.
- This sketch blinks the onboard LED on pin 13.
- Upload and Test:
- Connect the Uno to your computer via USB.
- Select the board (Tools > Board > Arduino Uno) and port (Tools > Port).
- Click “Upload” to send the sketch to the Uno.
- Watch the LED blink every second.
- Expand Your Project:
- Add components like a pushbutton or sensor.
- Use Arduino libraries (e.g., DHT.h for temperature sensors) to simplify coding.
- Explore tutorials on Arduino’s official site or community forums.
Pros and Cons of the Arduino Uno
Pros
- Beginner-Friendly: Extensive tutorials, examples, and community support make it easy to learn.
- Versatile: Suitable for a wide range of projects, from basic to intermediate.
- Shield Compatibility: Works with most Arduino shields, expanding functionality (e.g., Ethernet, motor control).
- Affordable: Priced at ~$27, it’s budget-friendly for students and hobbyists.
- Durable: Robust design withstands frequent use and prototyping.
Cons
- Limited Resources: 32 KB flash memory and 2 KB SRAM restrict complex projects with large code or data.
- No Built-In Connectivity: Lacks Wi-Fi or Bluetooth, requiring external modules for IoT applications.
- USB Type-B: Less modern compared to USB-C or micro-USB on newer boards.
- 8-Bit Architecture: Less powerful than 32-bit boards like the Arduino Due or Zero.
Why Choose the Arduino Uno?
The Arduino Uno is the ideal choice for:
- Beginners: Its simplicity and wealth of resources (tutorials, forums, books) make it perfect for learning electronics and programming.
- Educators: Widely used in STEM education for teaching microcontroller concepts.
- Hobbyists: Offers enough flexibility for prototyping without overwhelming complexity.
- Budget-Conscious Makers: Affordable yet capable for most small to medium projects.
If your project requires more pins (e.g., Arduino Mega), built-in Wi-Fi (e.g., MKR WiFi 1010), or a smaller form factor (e.g., Nano), you may consider other boards. However, for most entry-level and intermediate projects, the Uno’s balance of features and ease of use is unmatched.
Practical Example: Building a Simple Project
To illustrate the Uno’s capabilities, consider a temperature monitoring project:
- Components: Arduino Uno, DHT11 temperature/humidity sensor, breadboard, jumper wires.
- Setup:
- Connect the DHT11 to the Uno (VCC to 5V, GND to GND, data pin to digital pin 2).
- Install the DHT.h library in the Arduino IDE.
- Code:
#include <DHT.h> #define DHTPIN 2 #define DHTTYPE DHT11 DHT dht(DHTPIN, DHTTYPE); void setup() { Serial.begin(9600); dht.begin(); } void loop() { float temp = dht.readTemperature(); if (isnan(temp)) { Serial.println("Failed to read from DHT sensor!"); return; } Serial.print("Temperature: "); Serial.print(temp); Serial.println(" °C"); delay(2000); } - Outcome: The Uno reads the temperature every 2 seconds and displays it in the Serial Monitor, demonstrating sensor integration and serial communication.
This project showcases the Uno’s ability to interface with sensors, process data, and communicate results, all with minimal setup.
Conclusion
The Arduino Uno is a versatile, beginner-friendly microcontroller board that has earned its place as the most popular Arduino model. Its robust design, extensive community support, and compatibility with a wide range of components make it an excellent choice for learning, prototyping, and building creative projects. Whether you’re blinking an LED, controlling a robot, or monitoring environmental data, the Uno provides a solid foundation for your electronics journey.
Ready to explore the Arduino Uno? Grab a board, download the Arduino IDE, and start experimenting. Share your projects or questions in the comments below, and join the vibrant Arduino community!